Create a Simple Job
The example will show you how to create, schedule, and deploy a simple job to the Data Pipeline server.
1. Create the job class
The easiest way to create a job is to implement java.lang.Runnable.
Inside your run() method, you can use the thread-local JobContext
to access the job's parameters and other properties. The JobContext
class can be found inside NorthConcepts-DataPipeline-Manager-Client.jar.
2. Create a project
The next step is to define your project.xml file.
Job parameters are expressions that get evaluated just before each job is run. See the Data Pipeline Expression Language page to understand what type of expressions are supported. For now, just keep in mind:
- String values must be quoted with double or single quotes or they will be treated as variables.
- Parameters can be defined at both the project and job levels.
3. Deploy the project
There are a couple ways to create and deploy a job. In either case, you'll need to compile and jar the job class you created in the first step.
The first option is the manual route — and arguably the quickest.
- Create a folder for your new project inside
<workspace-folder>/projects/. For example:c:\workspace\projects\hello-world-project\. - Place your
project.xmlfile inside your new project folder. - Create a
libfolder under your new project folder and place inside it any jars your jobs needs to run, including the one with the job class.
The second option uses the GUI.
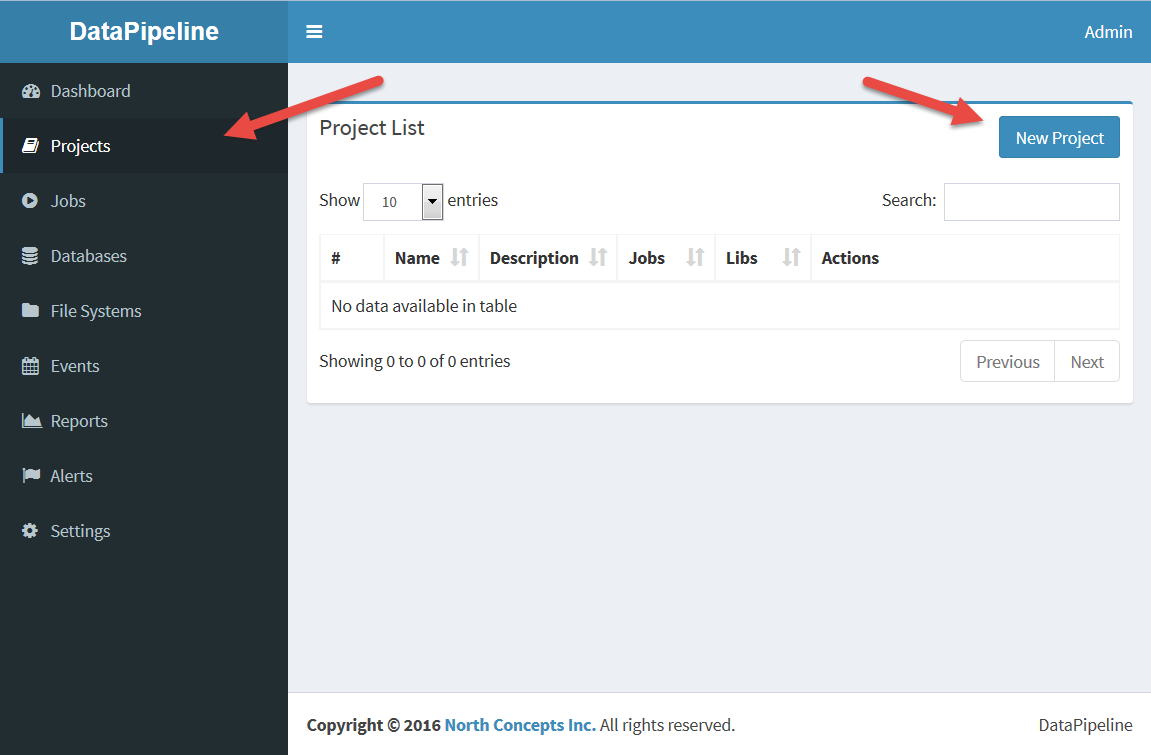
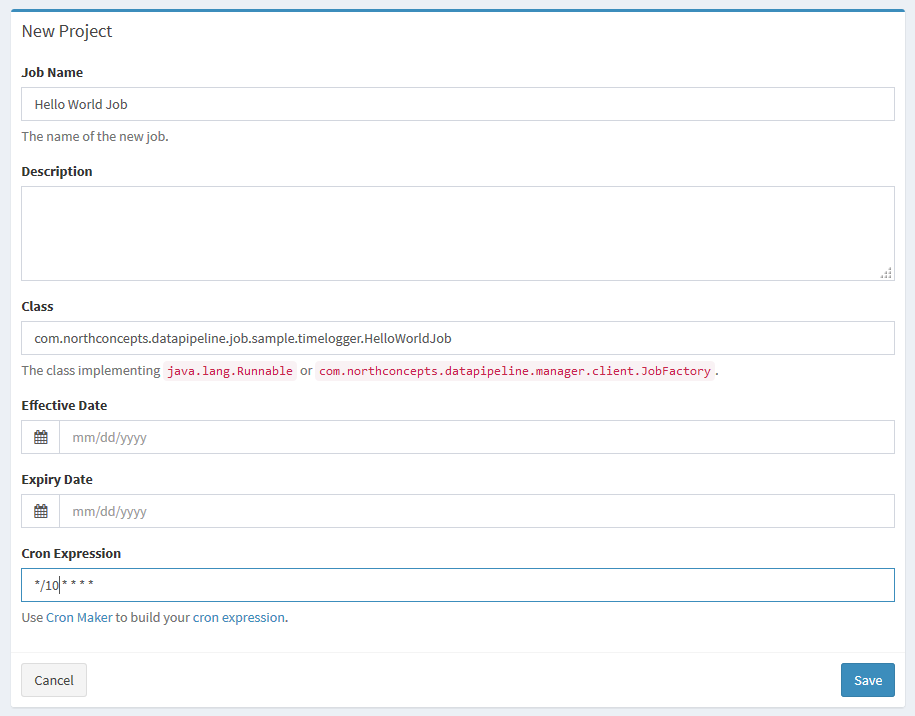
1. Go to the projects page and click the New Project button.
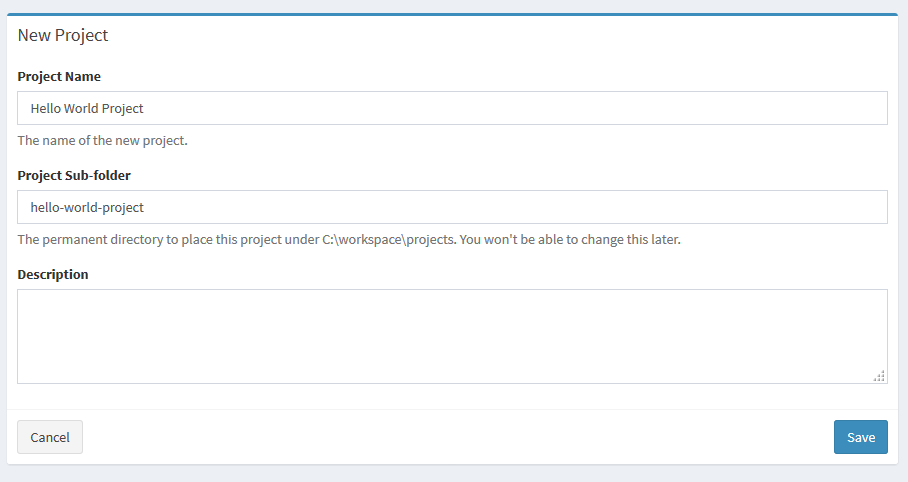
2. Fill out the new project form.
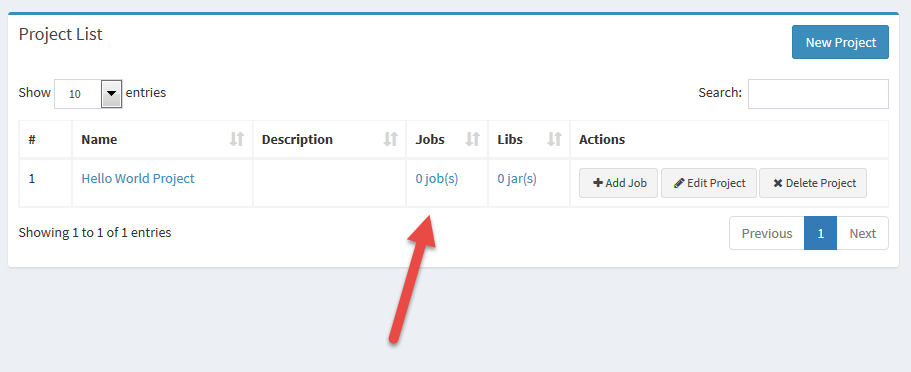
3. Click the jobs link on the projects page.
4. Fill out the new job form.
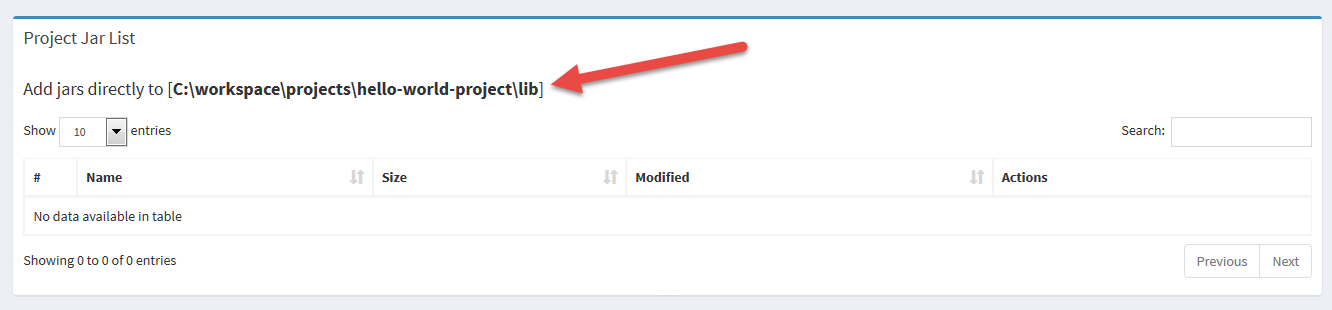
5. Select the jars link on the projects page.
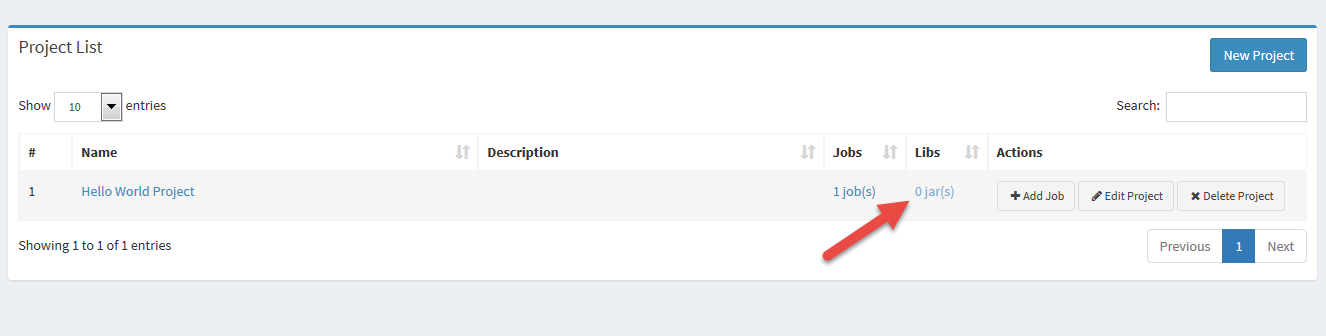
6. Manually copy your jars to the folder indicated on the project jars page.